Dev Setup
Local Development Setup
This page describes how to setup a local development environment for the Aid Management Platform.
Prerequisites
- Java 8
- PostgreSQL 14
- PosGIS
- IntelliJ IDEA
- Node.JS 16 (Or install it using your package manager of choice)
- Apache Tomcat 8
Setup
1. Clone the repository and initial setup
- You can clone the repository using the following command:
git clone git@github.com:devgateway/amp.git
- or using IntelliJ IDEA as shown below:
File -> New -> Project from Version Control -> Git
- another method using IntelliJ IDEA is shown below:
 |
 |
then you can choose the directory where you want to clone the repository, paste the repository URL and click on the Clone button.
-
Wait from the cloning process to finish.
-
Alternatively, you can clone the repository using the
git clonecommand -
After cloning the repository, you need to select the
ampdirectory in the cloned repository and open it as a project in IntelliJ IDEA. -
You will be prompted to import it as an Eclipse or Maven project. Select
Mavenand click onOK.

- Wait for the project dependencies to sync and Intellij to finish indexing the project.
2. Setup PostgreSQL
After installing PostgreSQL, you need to create a database and a user for the AMP application.
You can do this by running the following commands:
2.1 If you are using Unix/Linux or MacOS
- Connect to the PostgreSQL server using the
postgresuser:
sudo -u postgres psql
- Create a database role
amp
CREATE ROLE 'amp' NOLOGIN SUPERUSER CREATEDB CREATEROLE INHERIT NOREPLICATION CONNECTION LIMIT -1;
- Create a database
amp_<country_name>_<major_version>owned by theampuser
CREATE DATABASE 'amp_<country_name>_<major_version>' OWNER amp;
3. Setup PosGIS
After installing Postgres, you need to install the PostGIS extension.
You can do this by running the following command:
CREATE EXTENSION postgis;
2.2 Restoring the database from a backup
- If it’s an archive – extract it. (for .7z – 7za e
<filename.7z>; for .tar.gz – tar xzvf<filename.tar.gz>; for .tar.bz2 – tar xjvf<filename.tar.bz2>) - Move it to a location accessible to the postgres user (e.g. /tmp is a good place).
- Change to the user postgres.
- If it is a text dump, run the following command:
psql -U amp -d db_name -f /tmp/<filename.sql>
- If it is a binary dump, run the following command:
pg_restore -U amp -d db_name /tmp/<filename.dump>
- Wait for the restore to complete.
- Run the following command to update the site domain
UPDATE dg_site_domain SET site_domain = 'localhost';
2.3 If you are using Windows
- Open the
pgAdminapplication - Right click on
Serversand selectCreate -> Server - Enter a name for the server and click
Save - Expand the server and right click on
Databasesand selectCreate -> Database - Enter a name for the database and click
Save - Expand the database and right click on
Schemasand selectCreate -> Schema - Enter a name for the schema and click
Save - Expand the schema and right click on
Tablesand selectCreate -> Table - Enter a name for the table and click
Save
4. Setup Apache Tomcat
- Download the
apache-tomcat-8.5.65.zipfile from here - Extract the
apache-tomcat-8.5.65.zipfile. - Place the extracted folder in a location of your choice that can be accessed by IntelliJ IDEA.
5. Setup IntelliJ IDEA
After importing the project into IntelliJ IDEA, you need to configure the project to use the database, maven and Tomcat server.
You can follow the steps below to setup the project:
5.1 Configure Maven
- Open the
ampproject in IntelliJ IDEA -
Click on the
Choose Filemenu on the top right corner as shown below:
-
Click on the
Edit Configurations...option as shown below: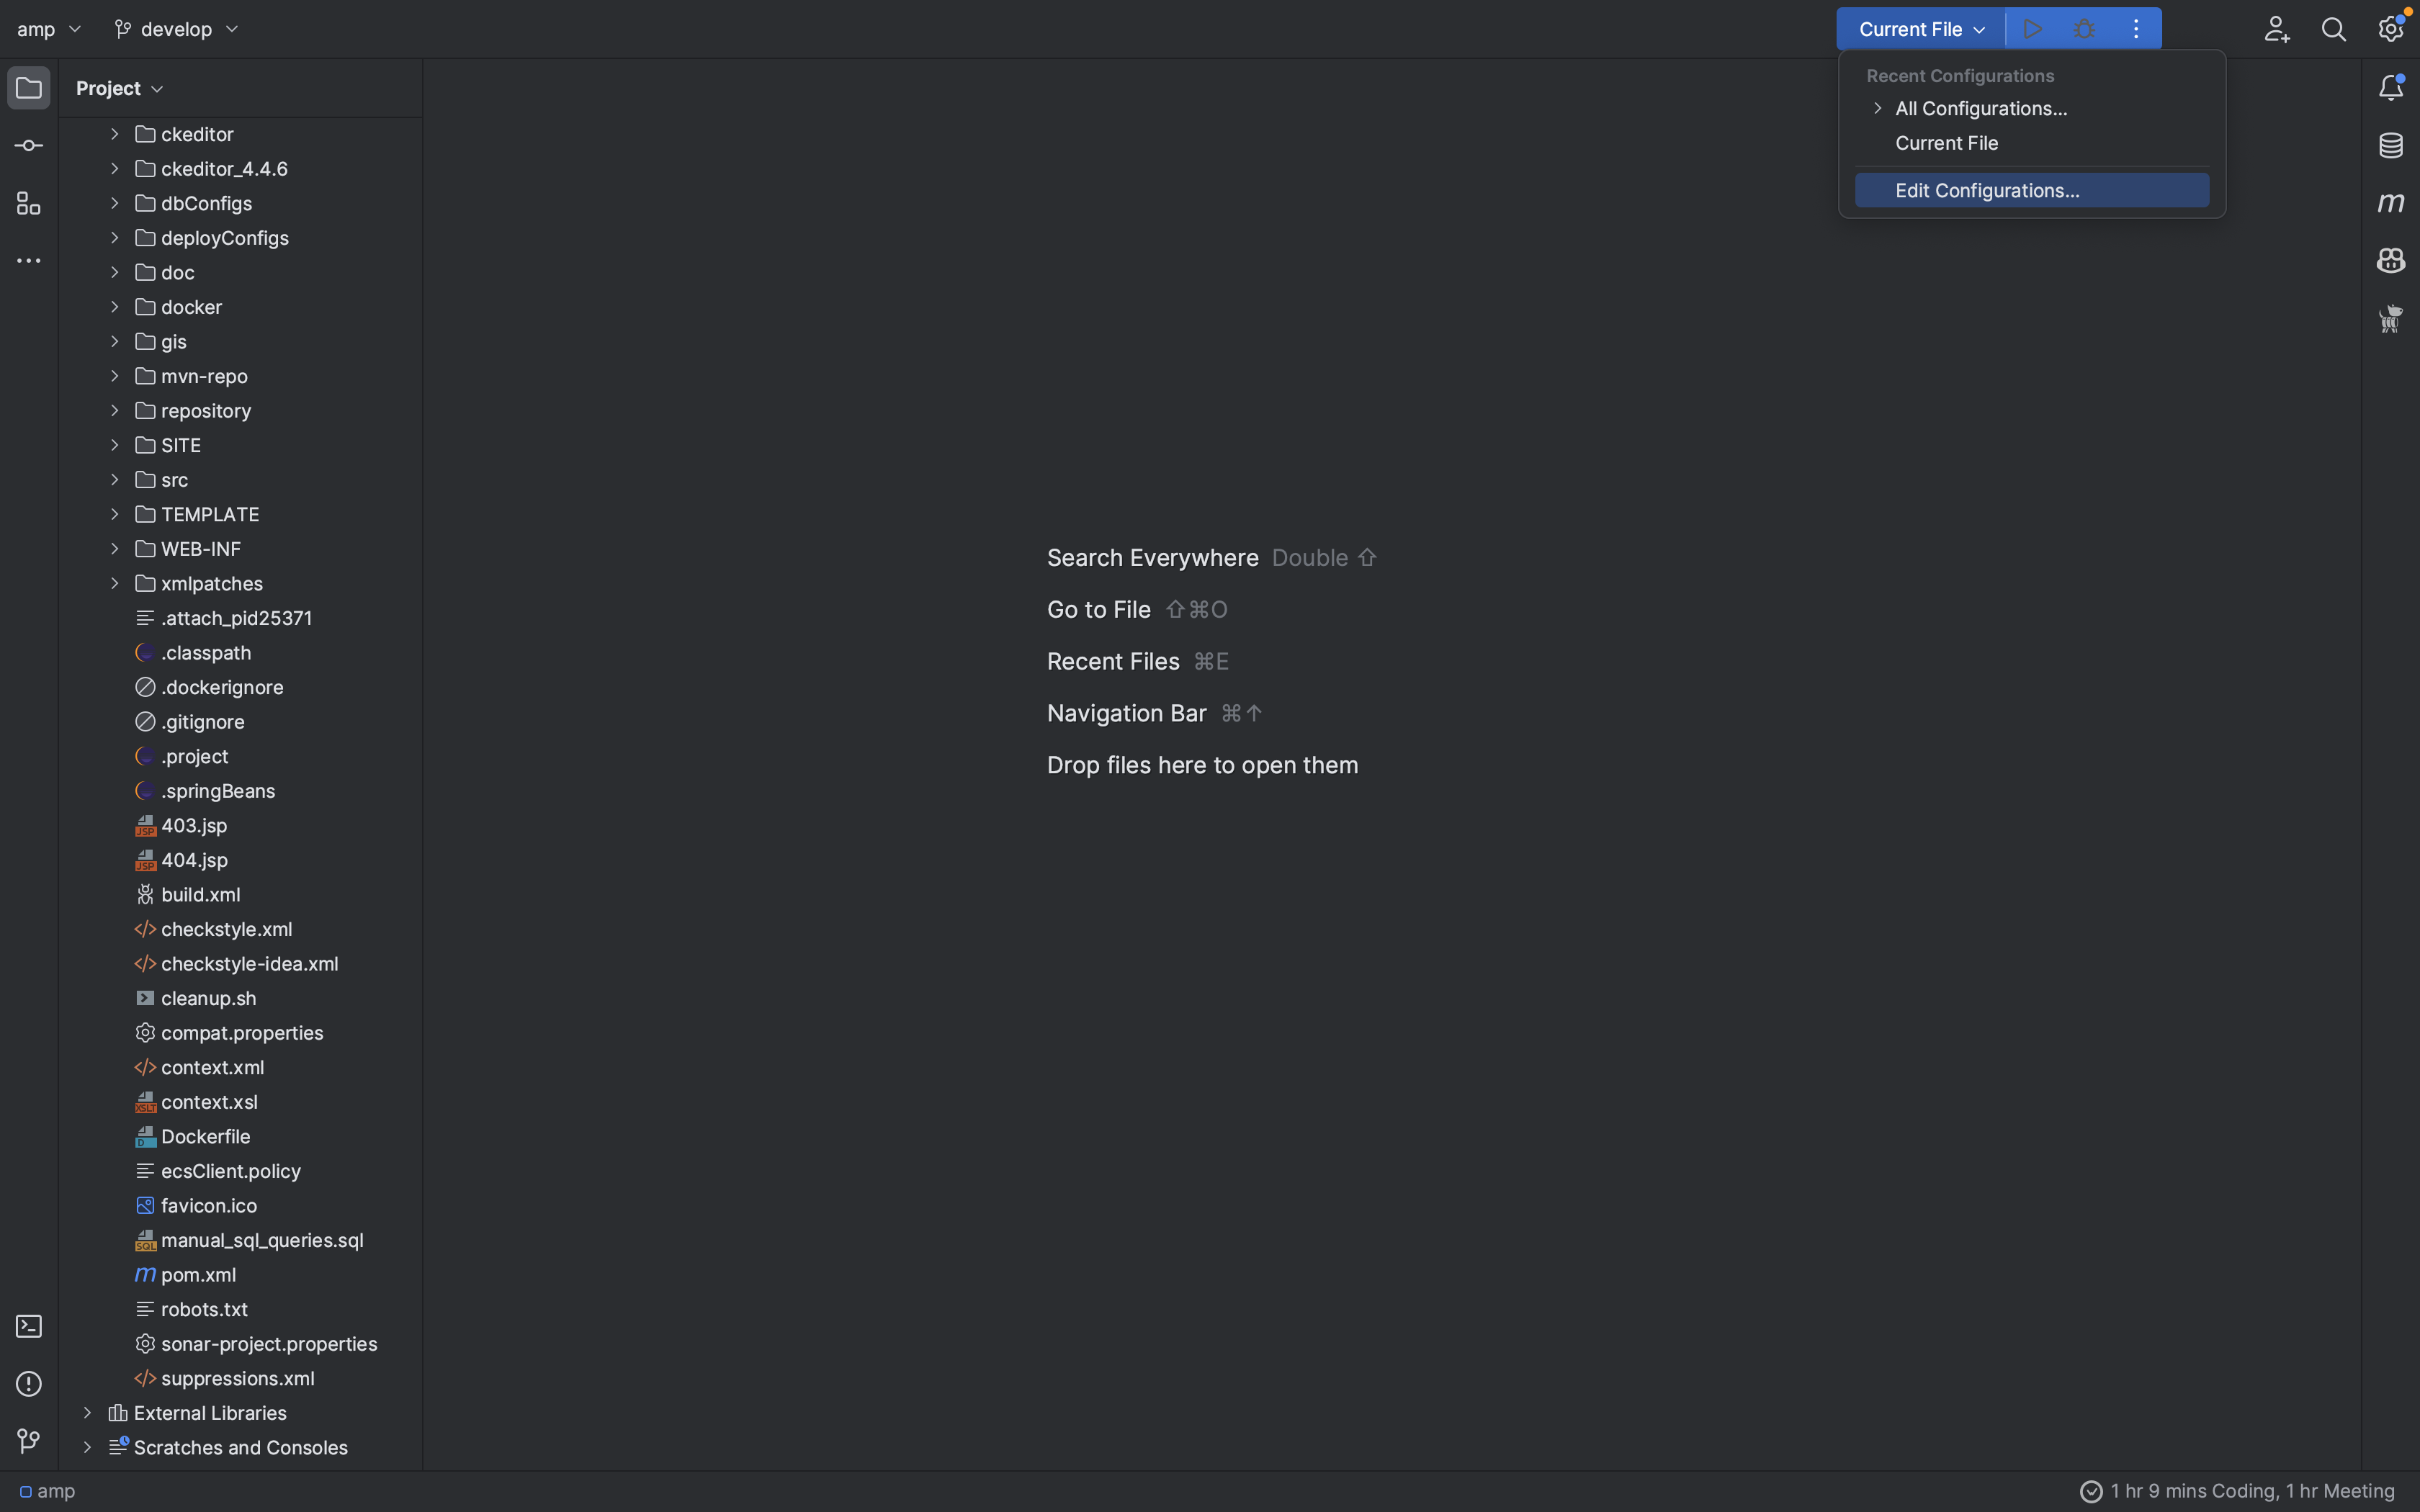
- Click on the
+button and selectMaven - Enter a name prefarably
ampfor the configuration -
Add the following to the maven run configuration:
clean compile war:exploded -DserverName=local -Djdbc.db=<db_name> -Djdbc.user=<db_username> -Djdbc.password=<db_password> -Djdbc.port=5432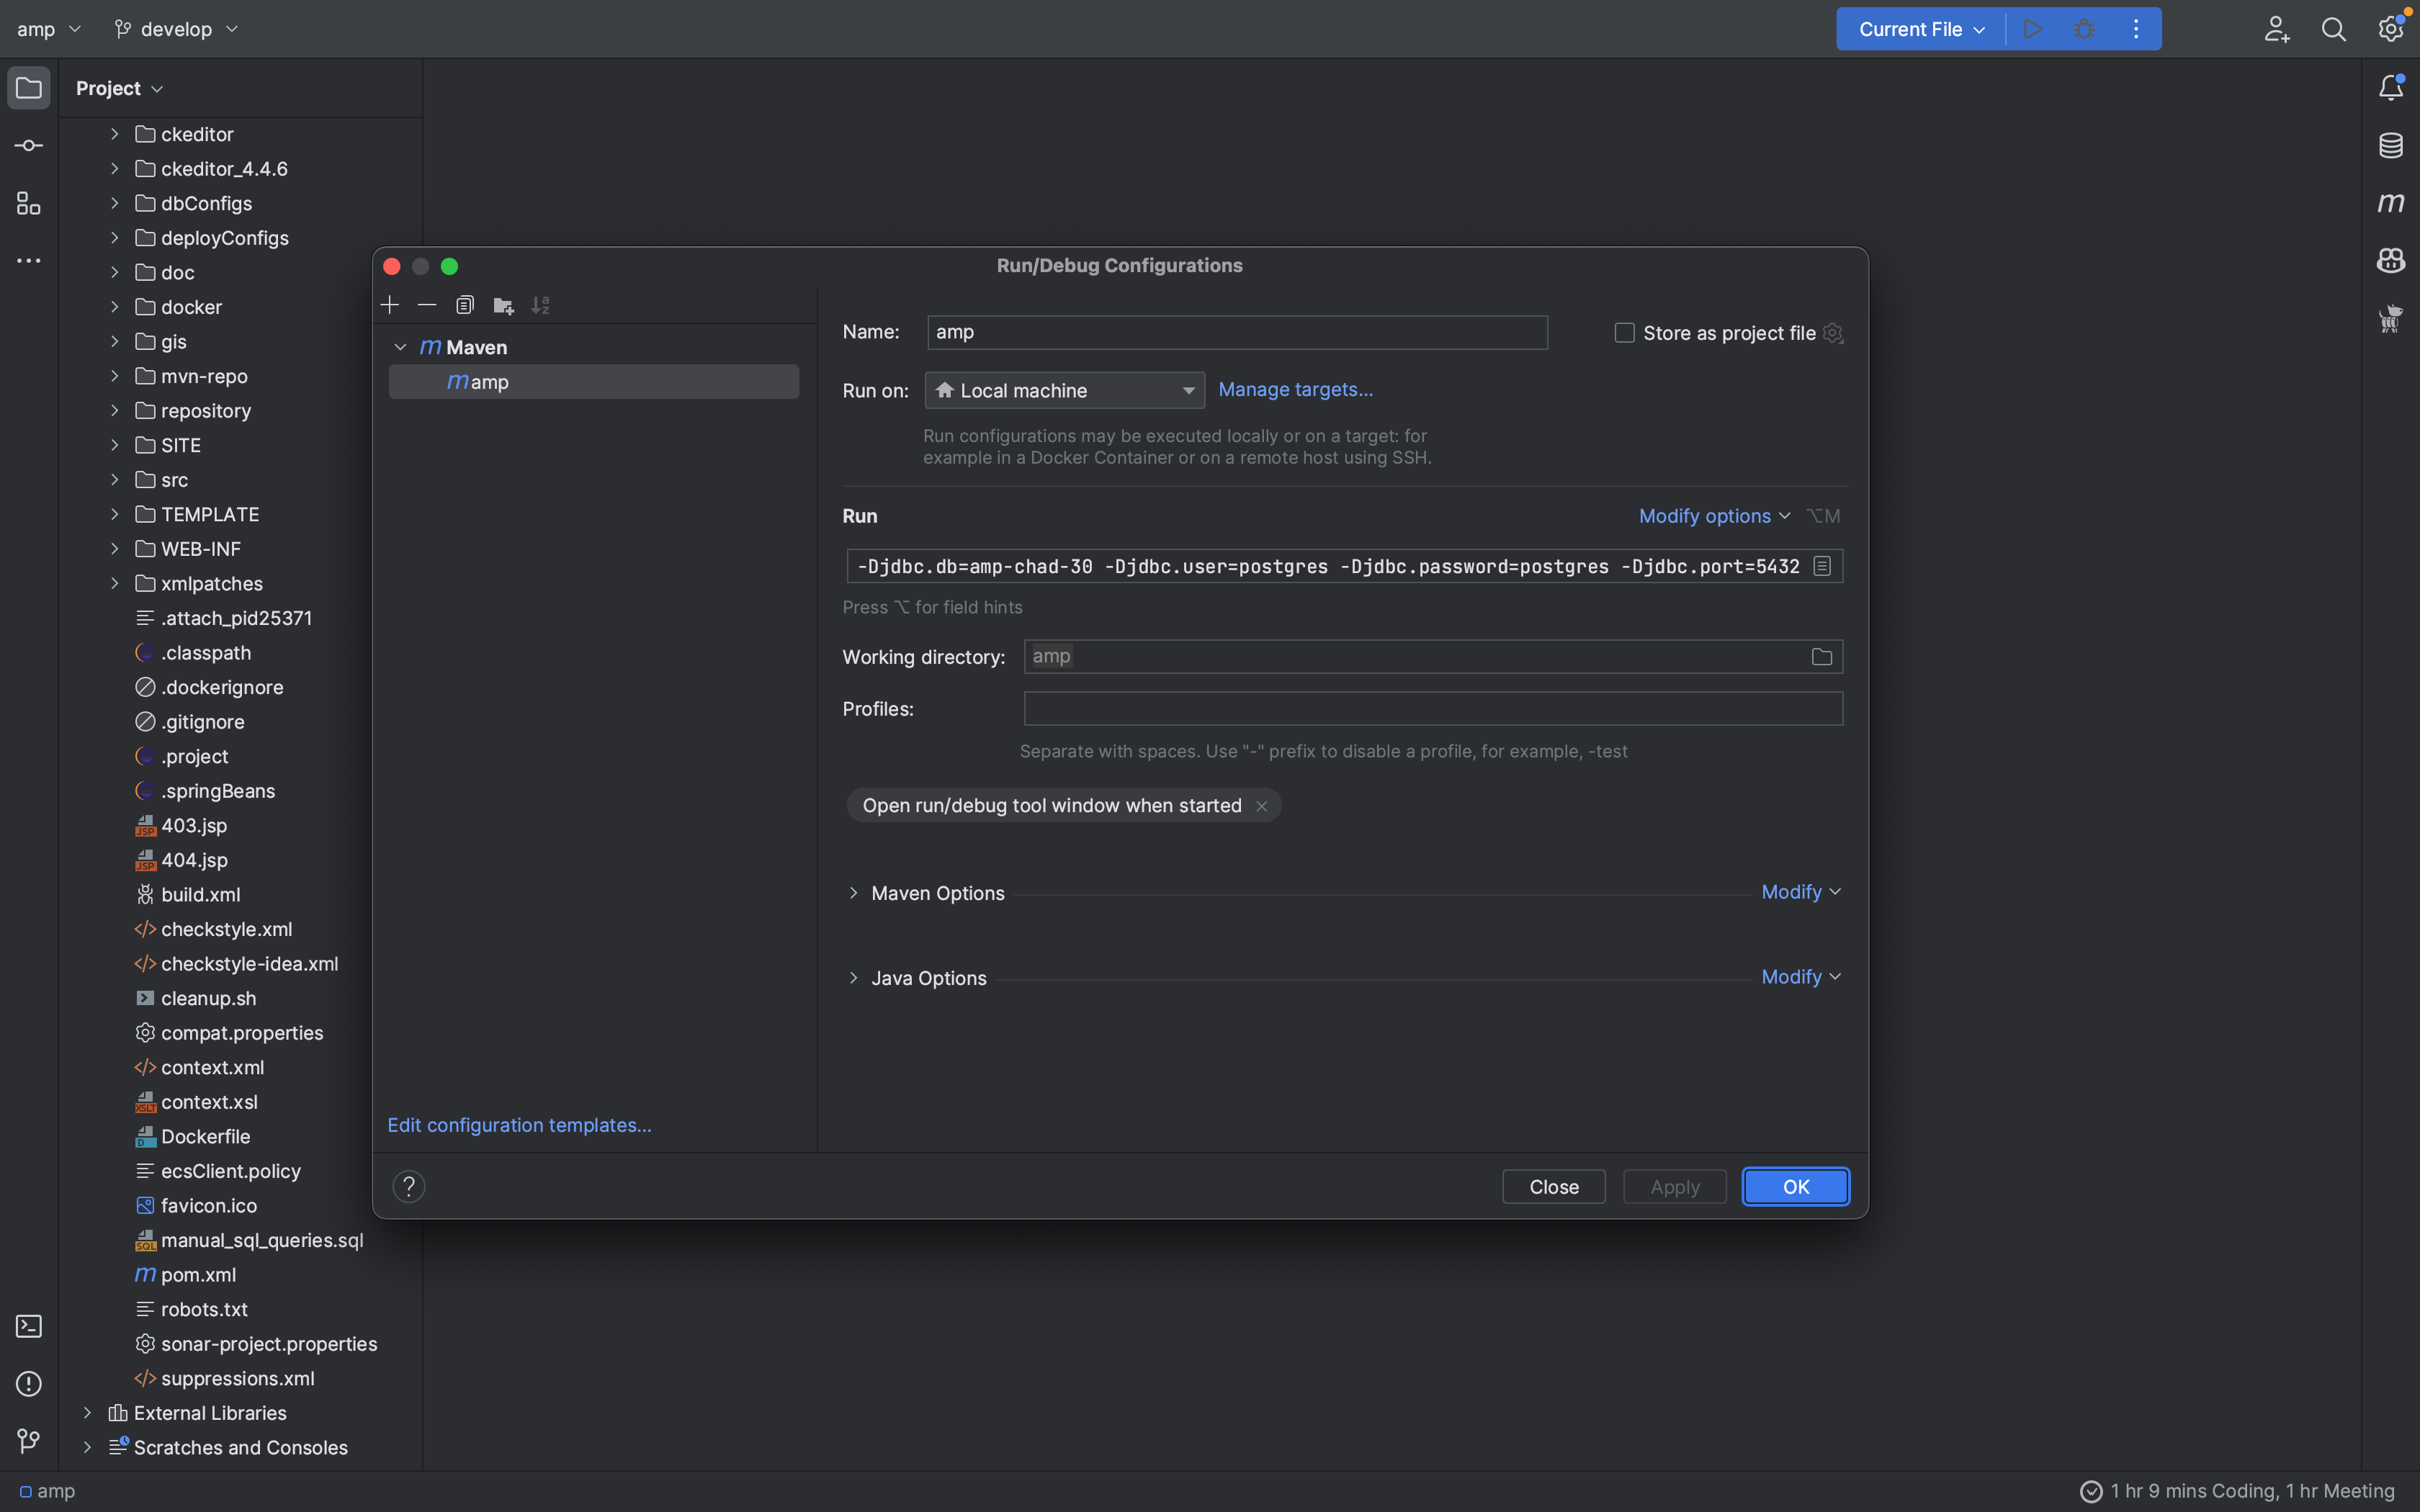
-
For concurrent builds, you can add the following flag to skip npm builds
bash -Dskip.npm=true - Click
OKto save the configuration -
Click on the Run Button on the top right corner as shown below or press
Shift + F10on Windows or⌃Ron Mac: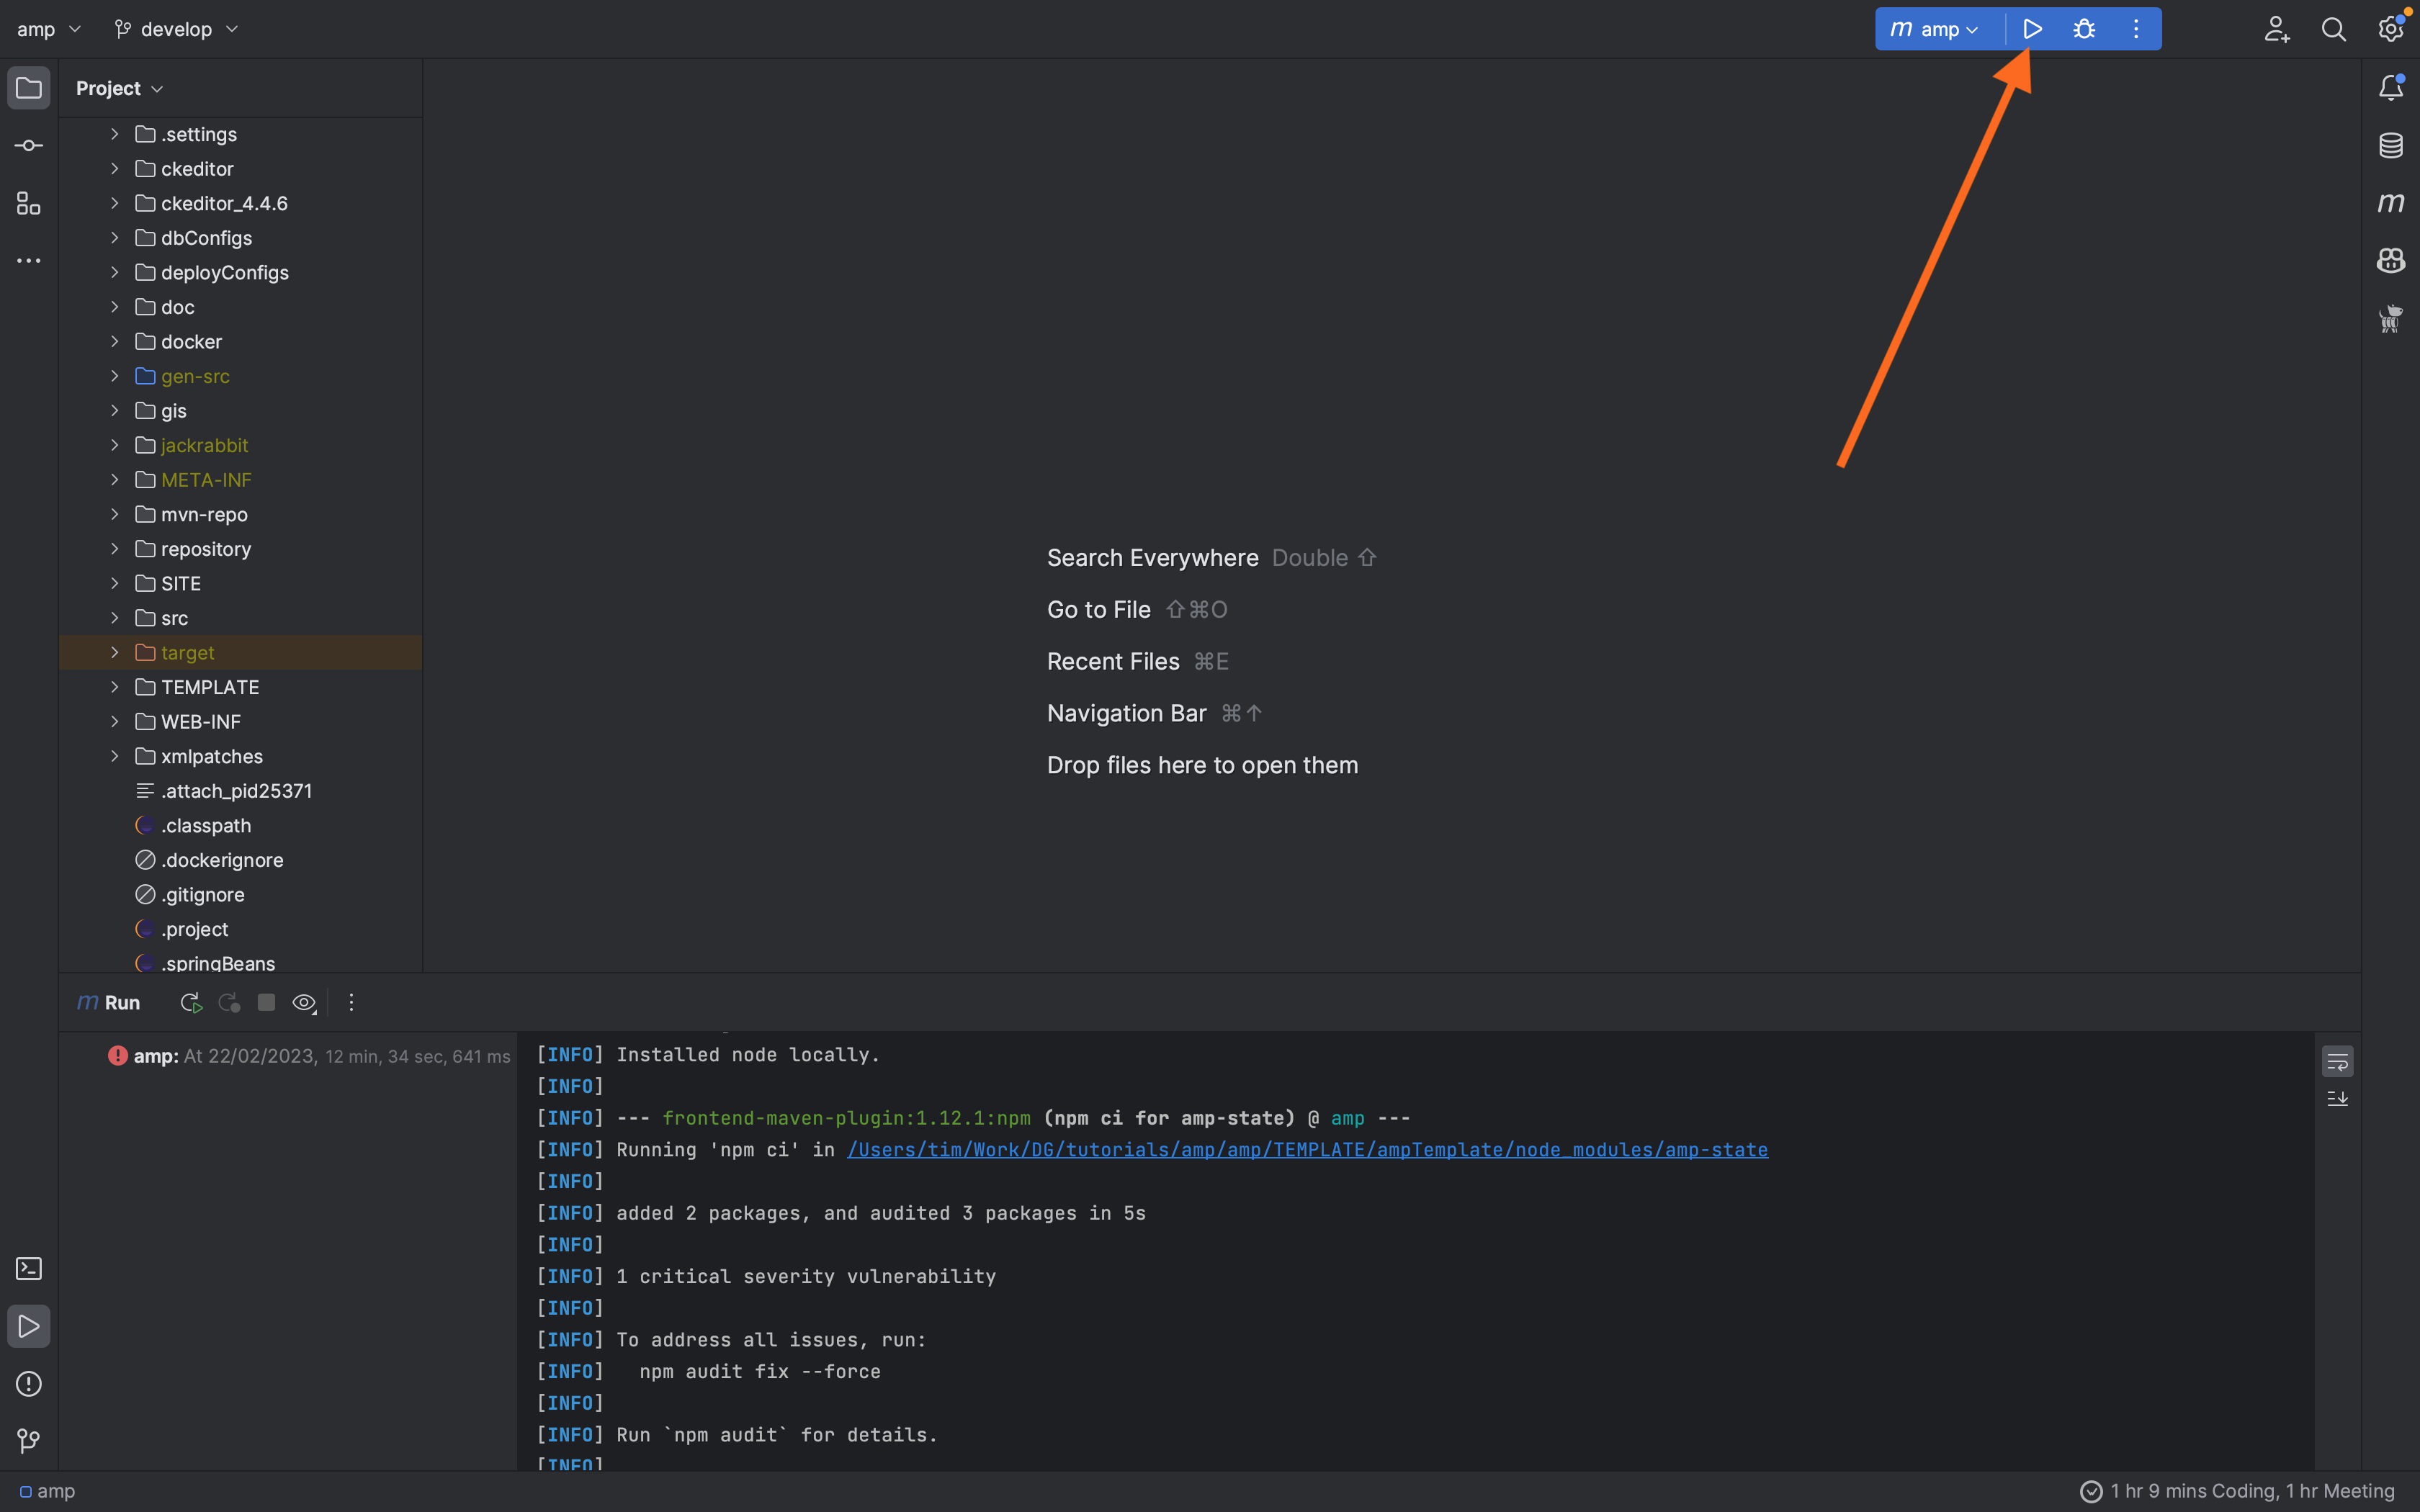
- Wait for maven to finish building the project


5.2 Configure Tomcat
-
Click on the
Edit Configurations...option as shown below: -
Click on the
+button and selectTomcat Server -> Local. You will see the following screen: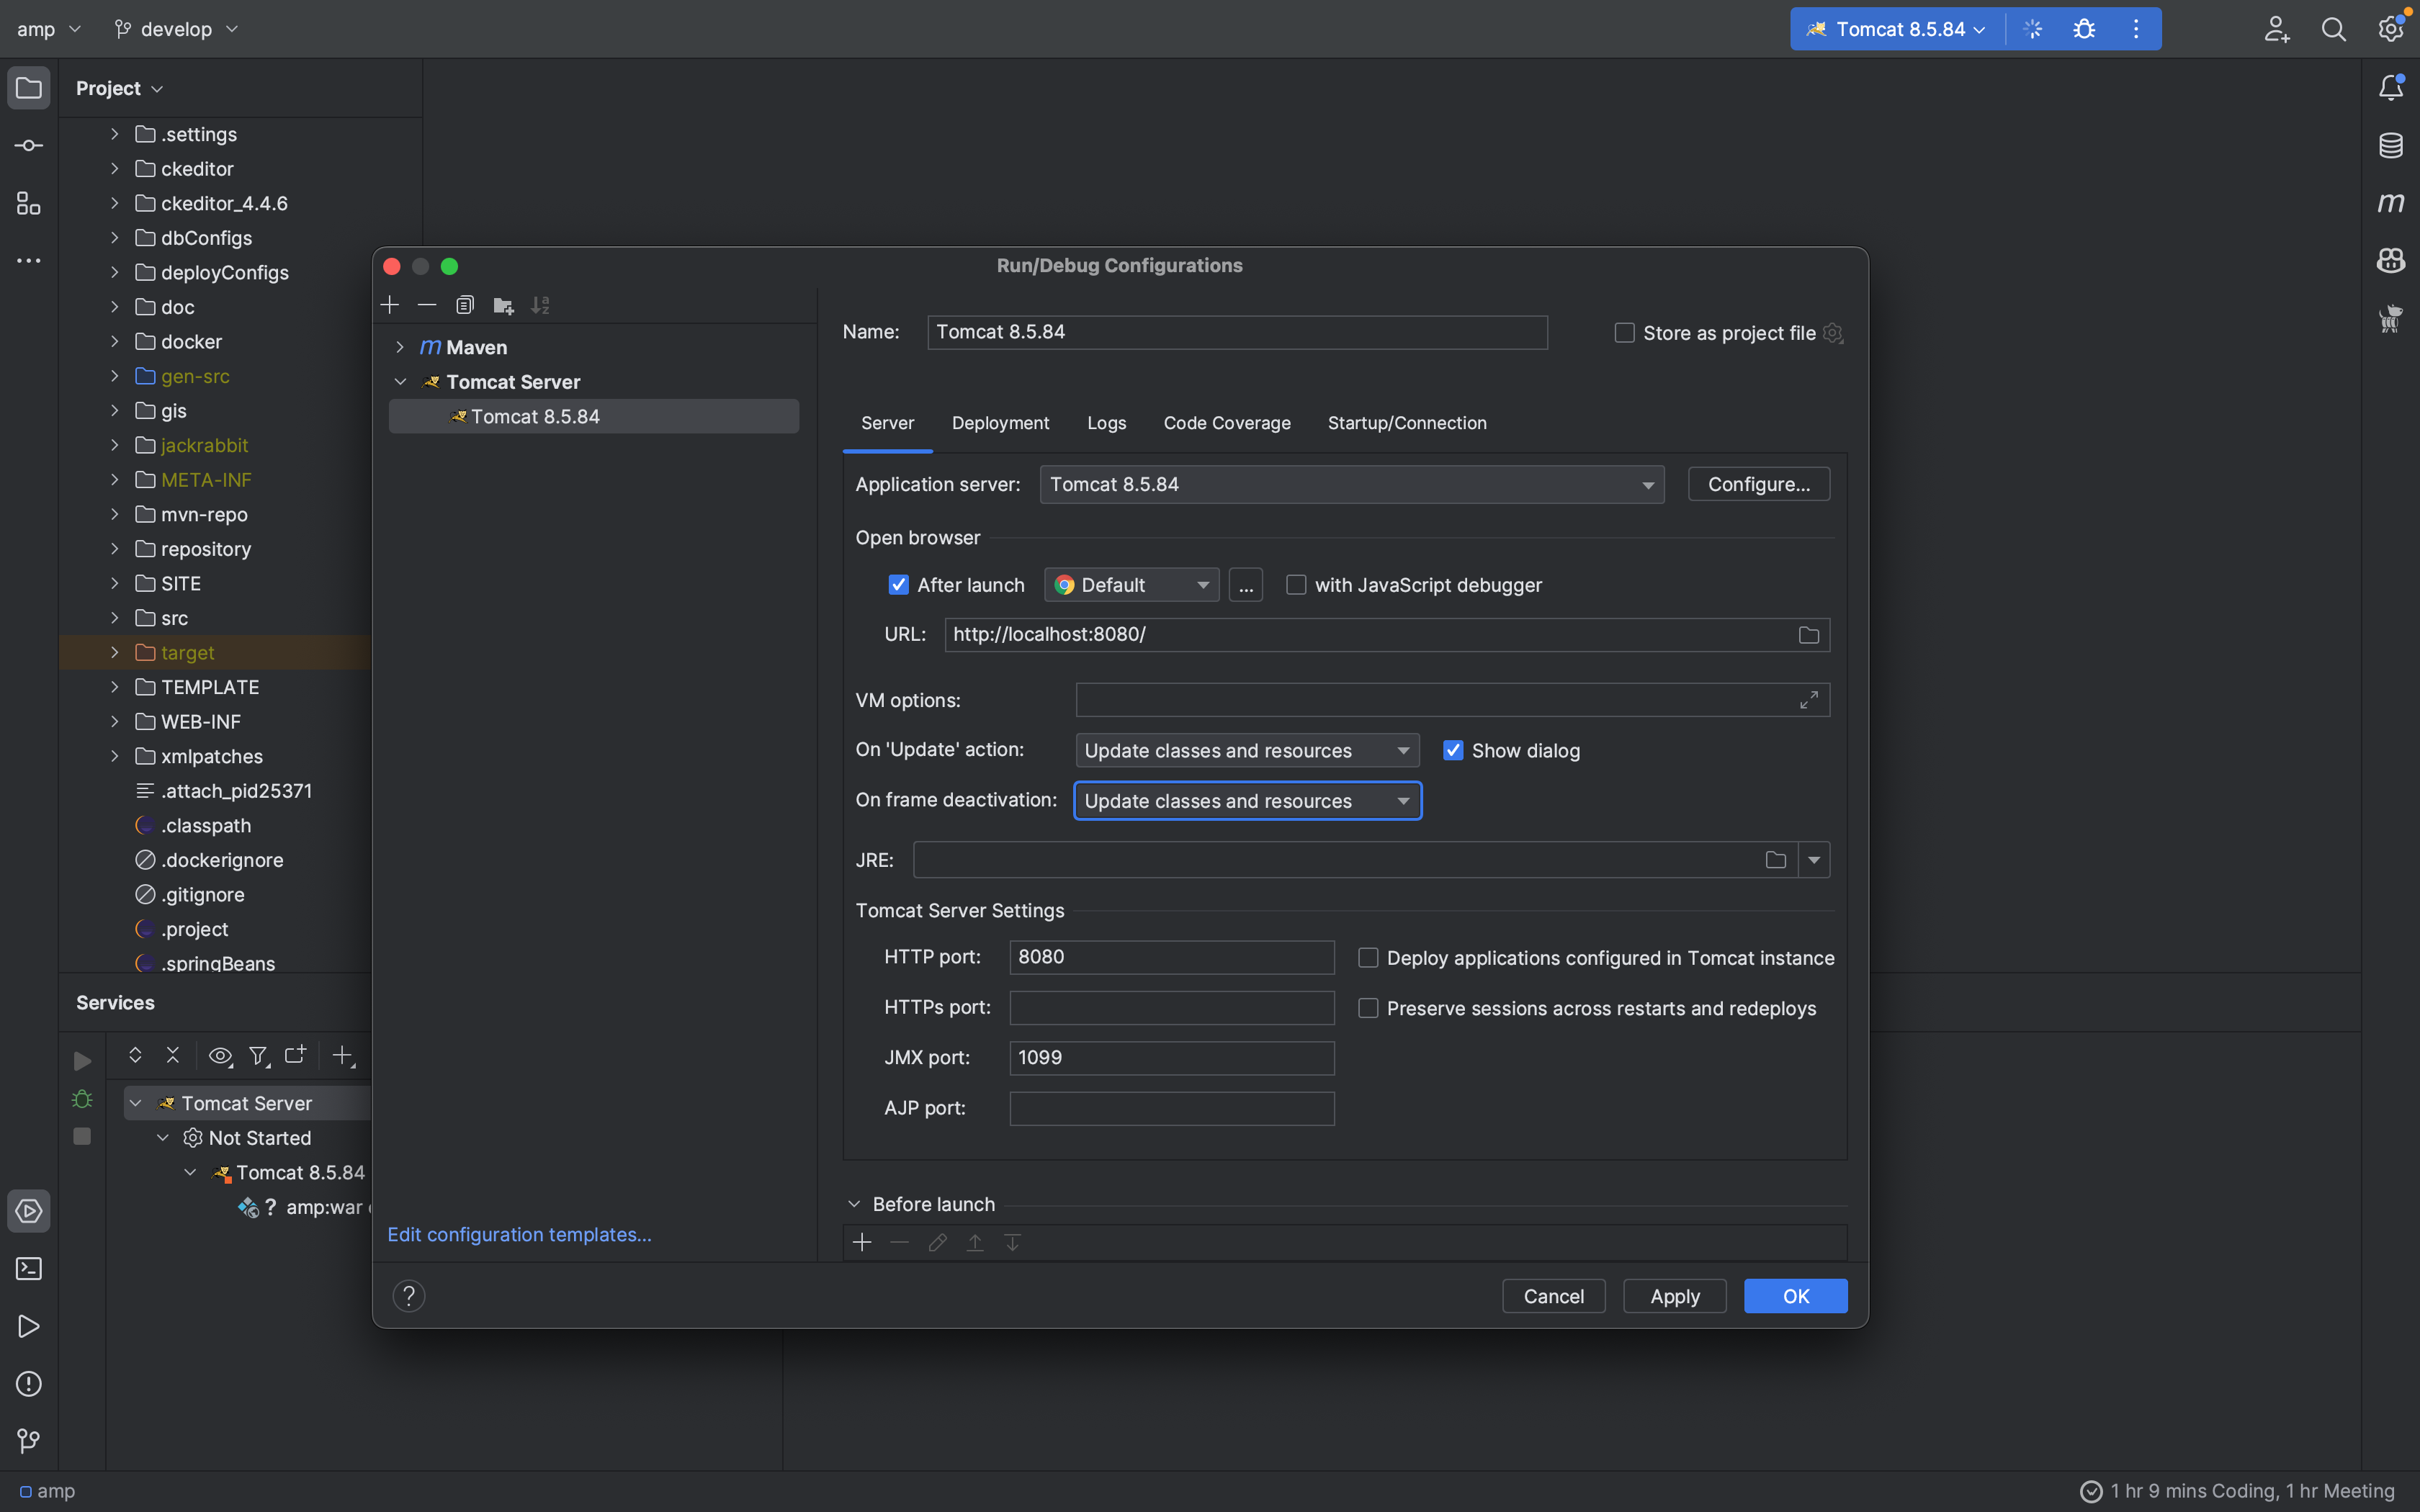
-
Add the following to the VM Options
-Djava.awt.headless=true -Dsun.net.client.defaultConnectTimeout=30000 -Dsun.net.client.defaultReadTimeout=30000 - Select
Update classes and resourcesfor theOn frame deactivationoption -
Select
Update classes and resourcesfor theOn update actionoption - Click on the configure button next to the
Application Serverfield and select the folder where tomcat is located folder as shown below: - Click on the
+button to select the tomcat folder

 |
 |
-
Click
OKto save the configuration -
Under the
Deploymenttab, click on the+button and selectArtifact...as shown below: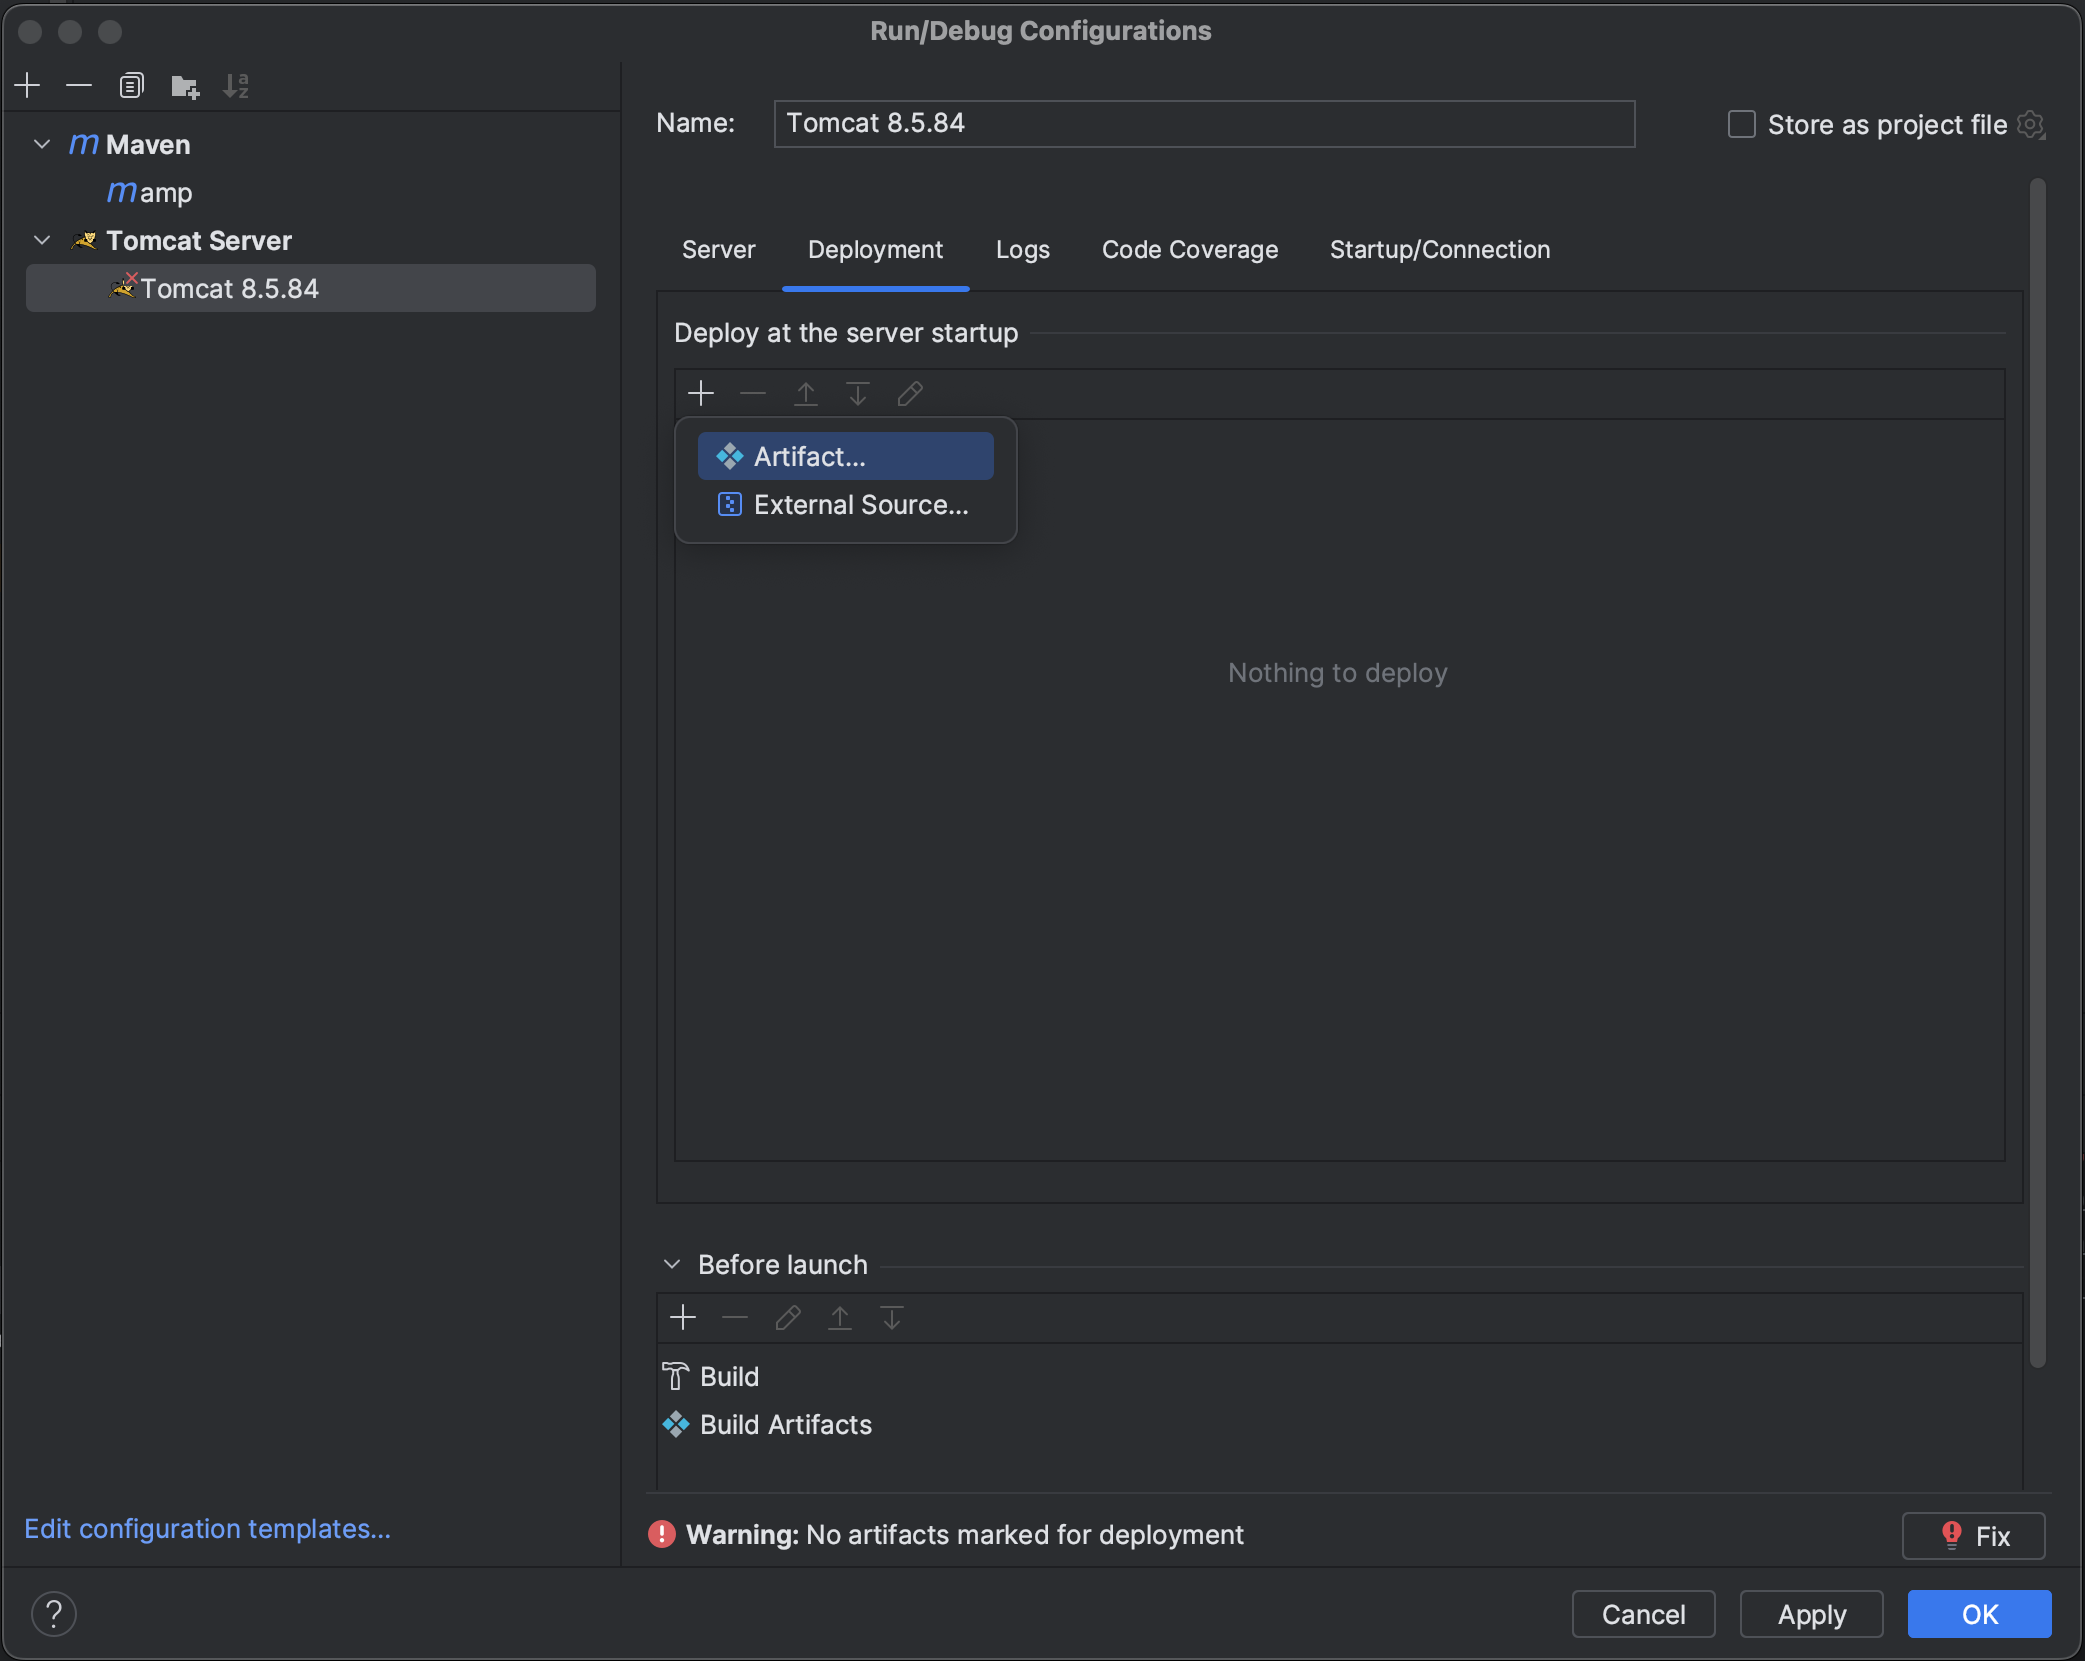
-
Select the
amp:war explodedartifact and clickOKas shown below: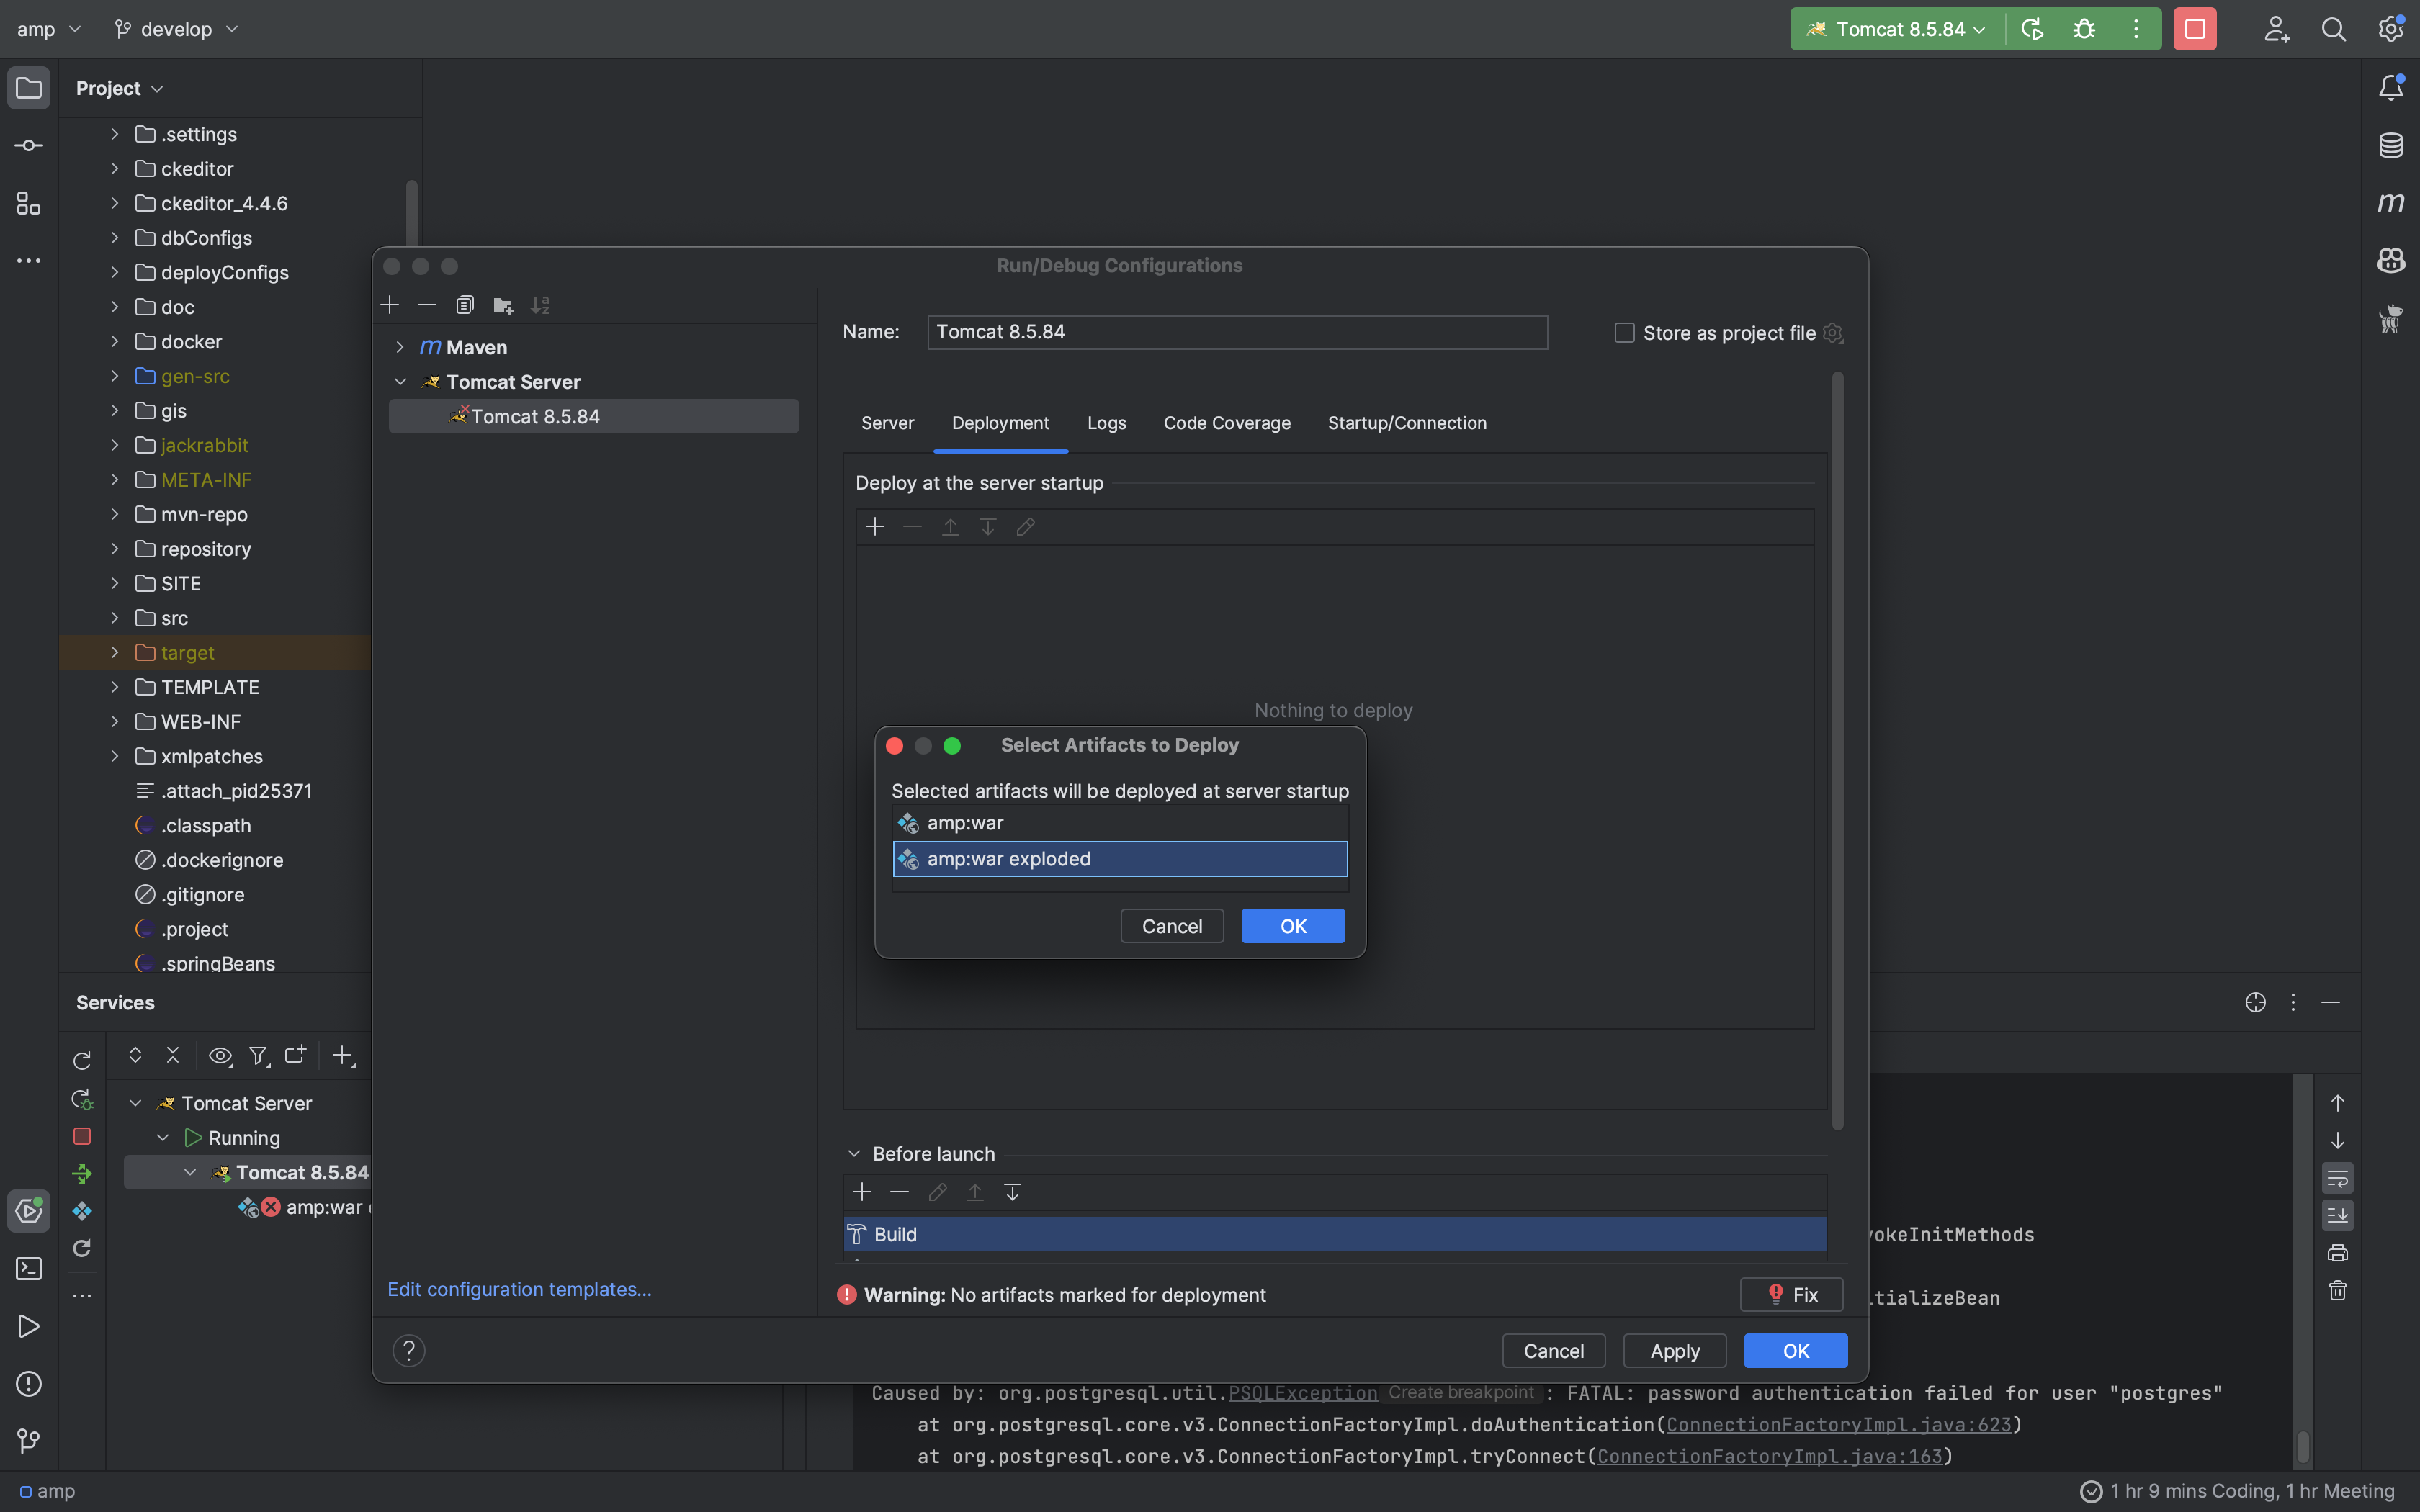
-
Set the Application context to
/as shown below: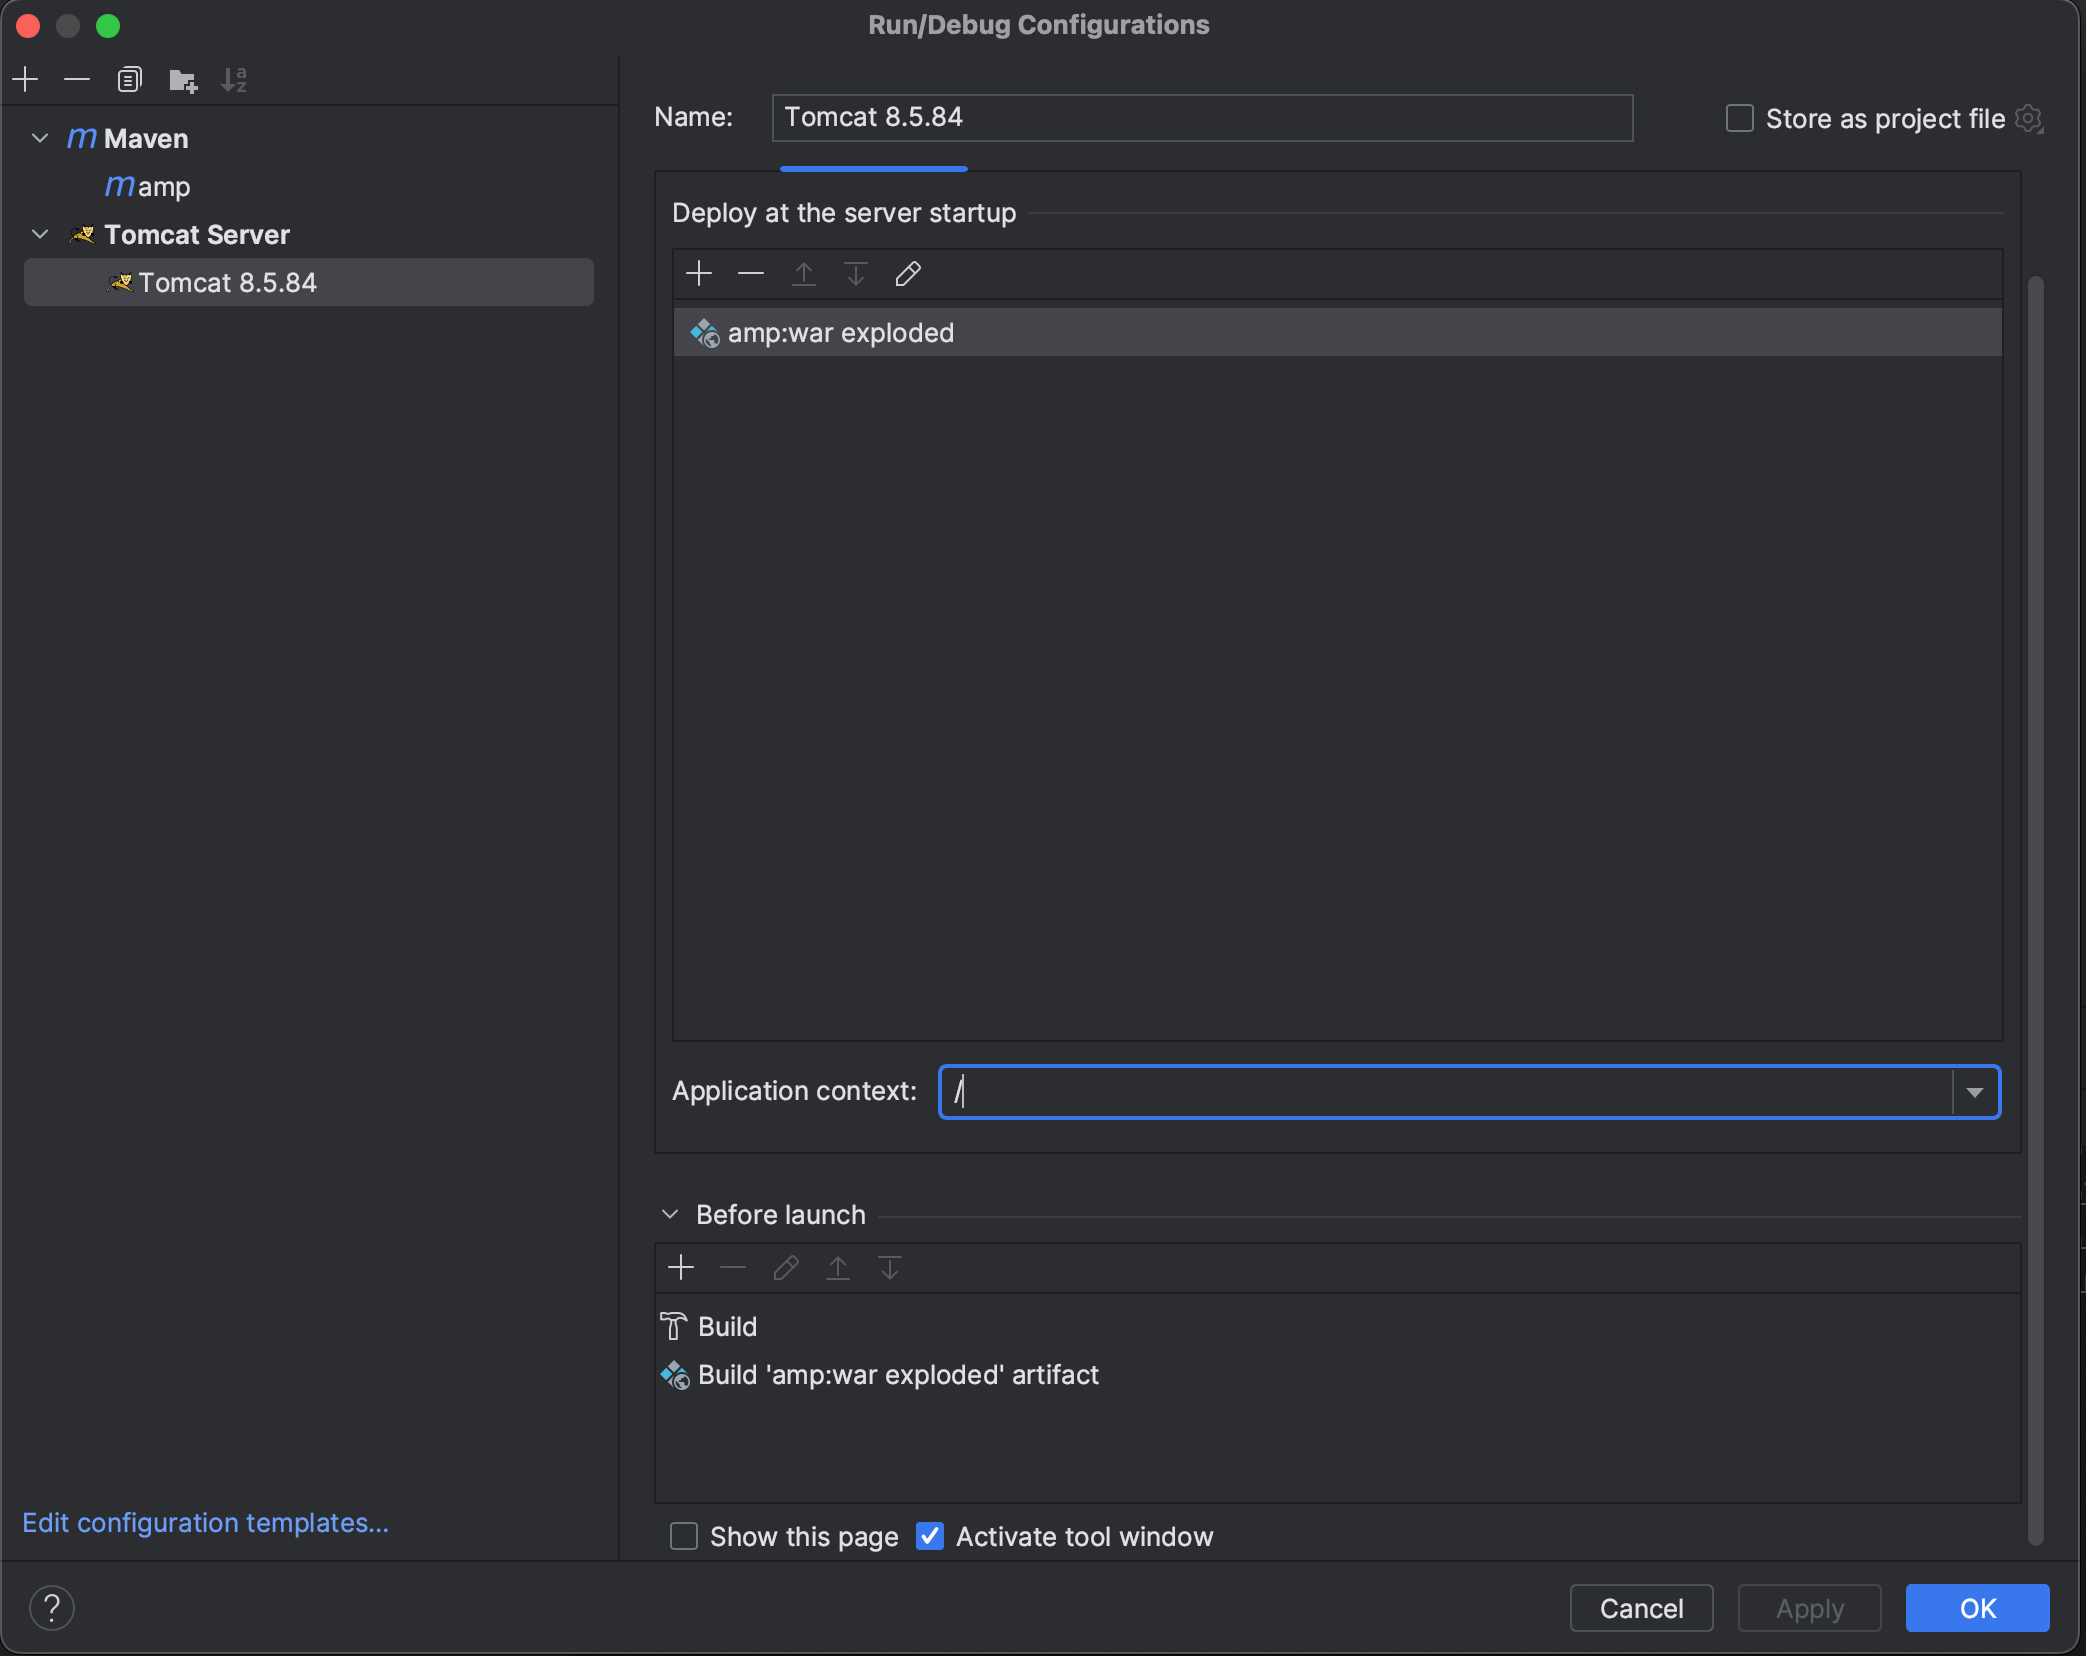
-
Click
OKto save the configuration


7. Running the application
You can run the application by following the steps below:
- Open the
ampproject in IntelliJ IDEA - Click on the
Runmenu - Run the application using the Tomcat configuration you created earlier
- Click the run button and wait for the application to start
-
You will be able to access the application at
http://localhost:8080/where you will see the login page as shown below: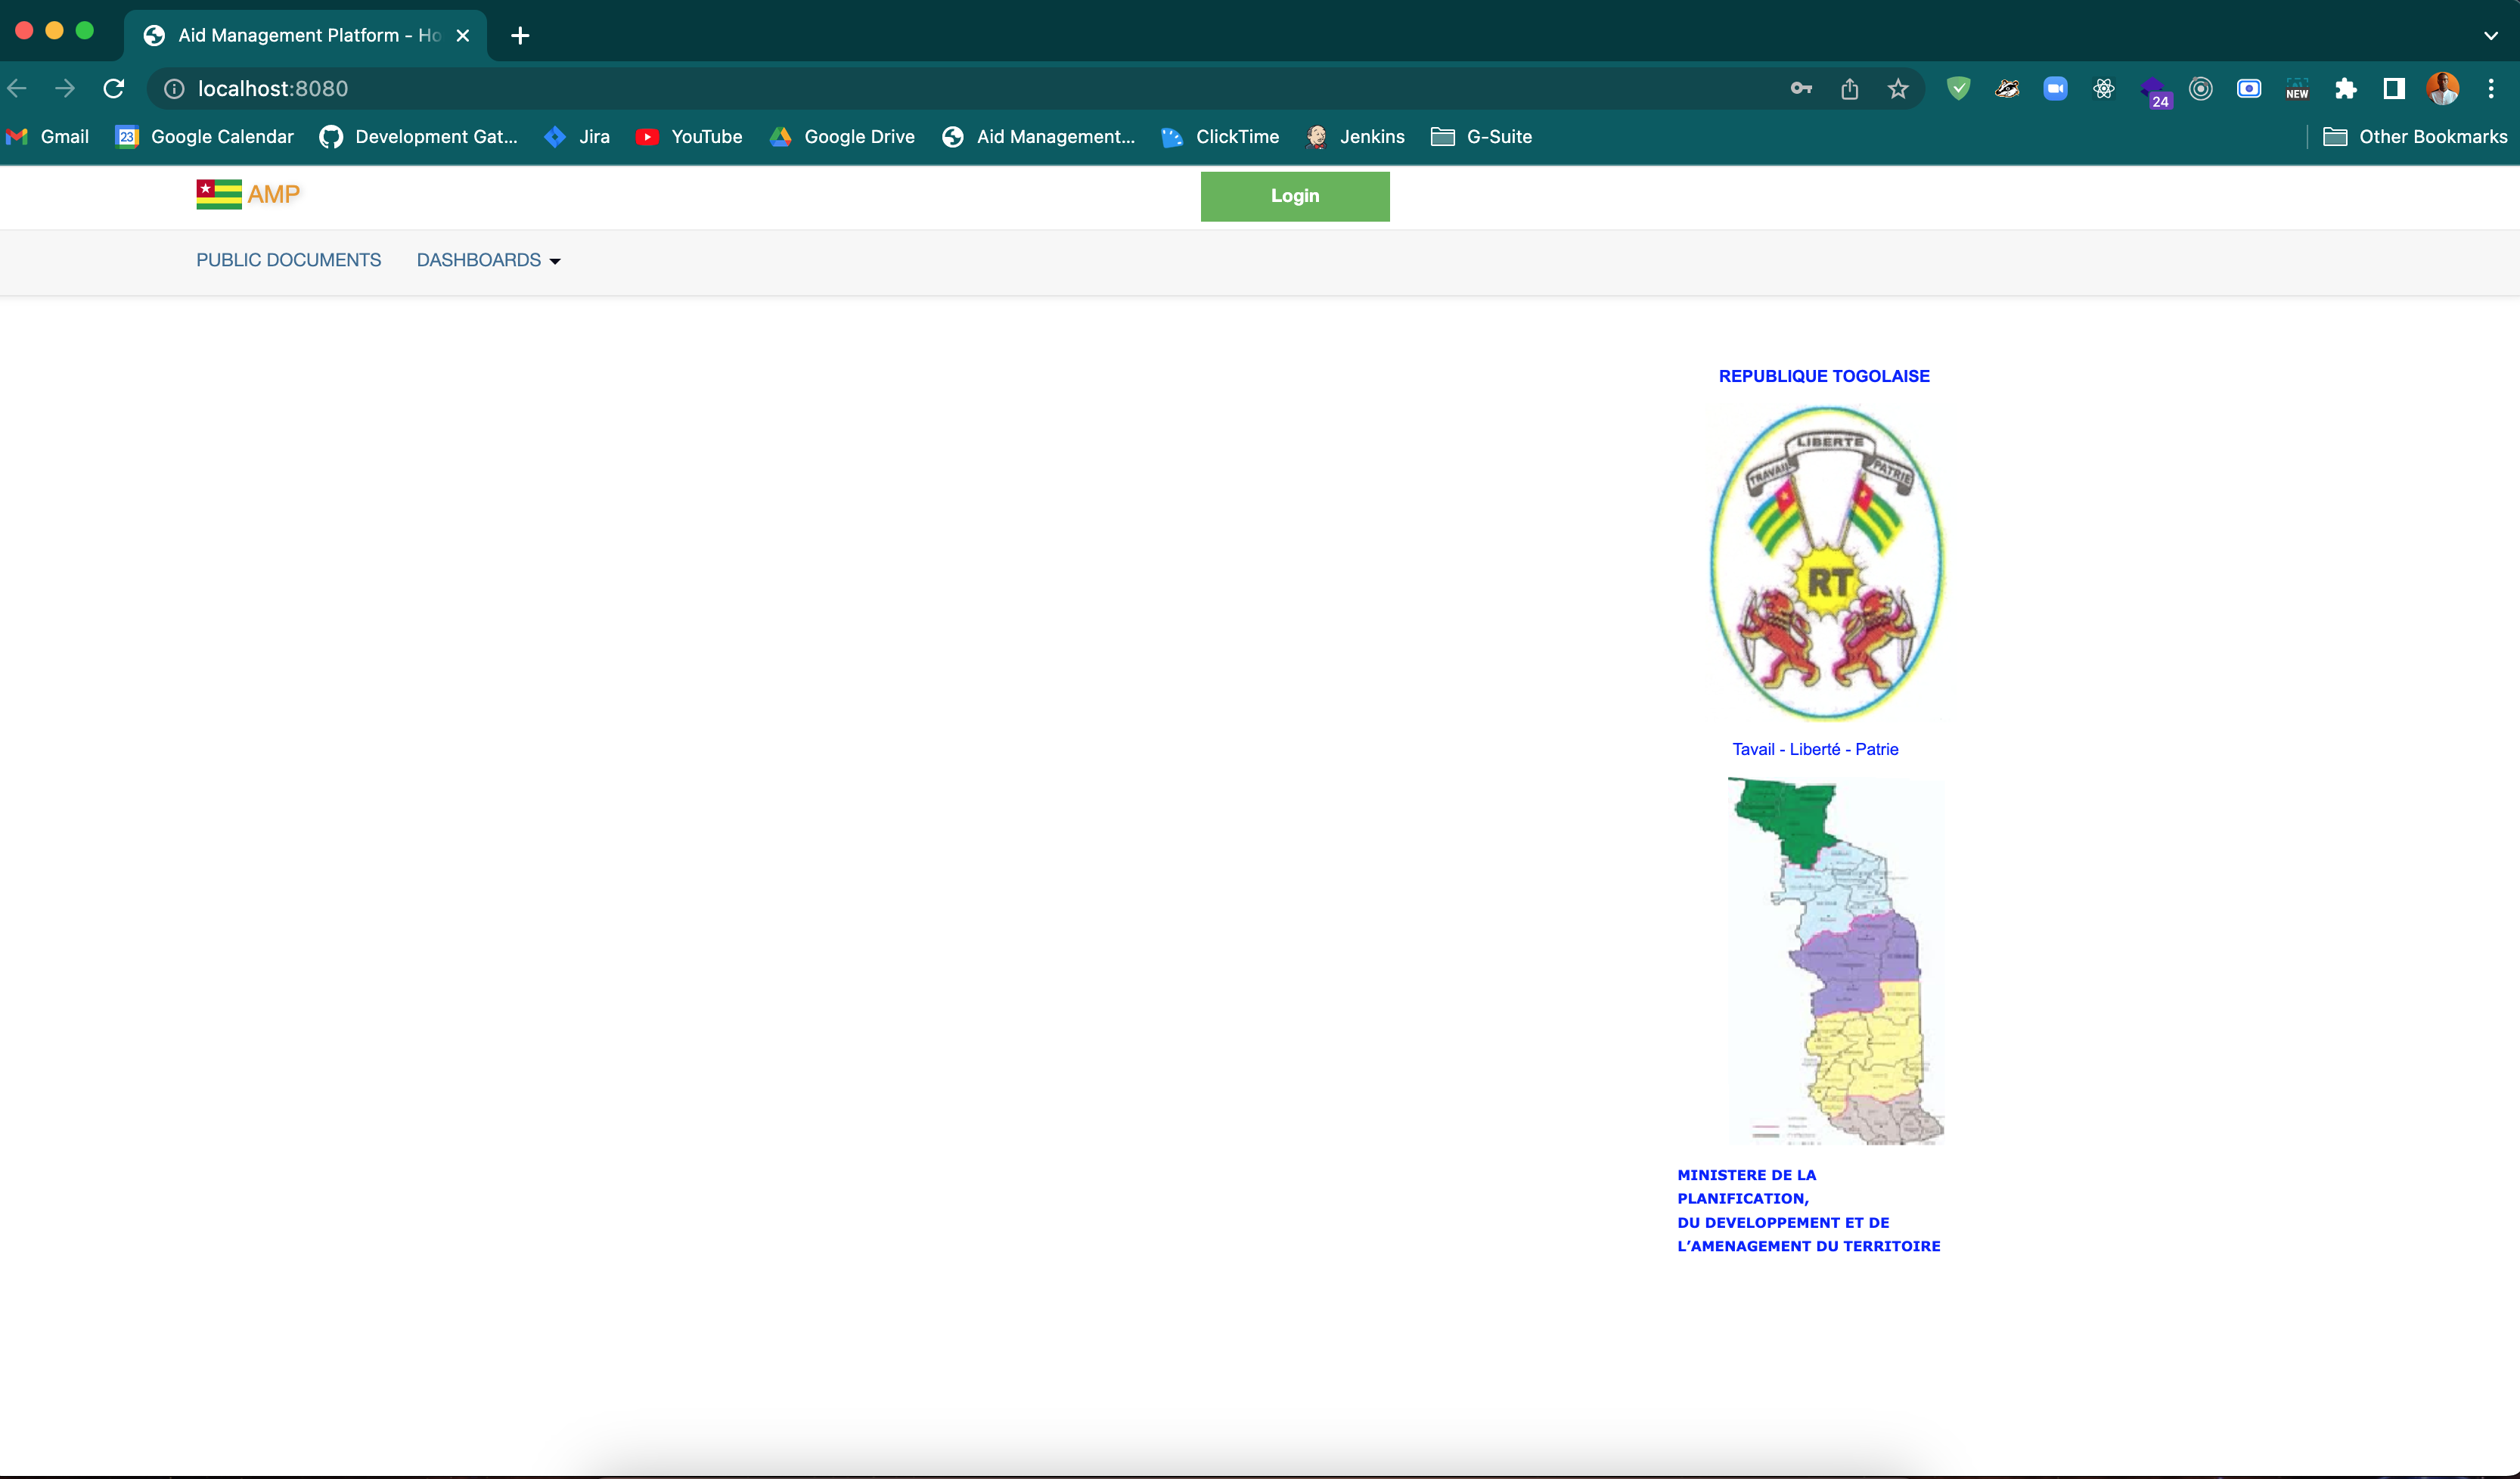
-
You can login using the following credentials for normal users:
Username: atl@amp.org Password: your_atl_password -
You can login using the following credentials for admin users:
  Username: admin@amp.org
  Password: your_admin_password
